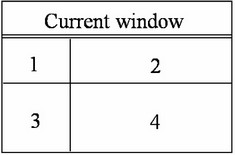
Active Drawing Window


Active Drawing Window |
|
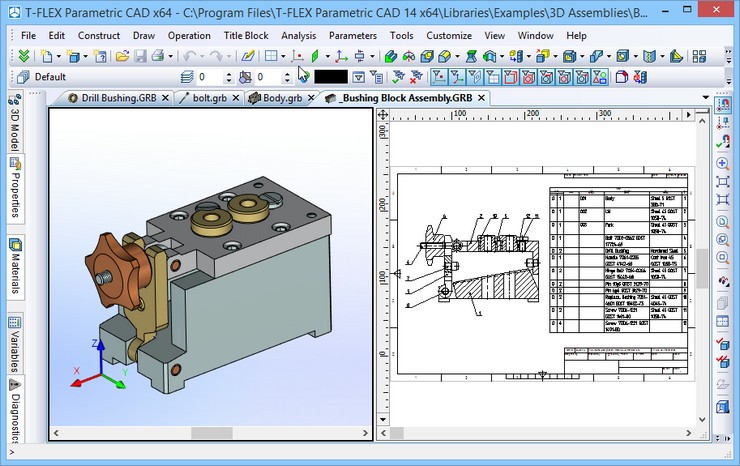
The T-FLEX CAD allows the user to work with several documents simultaneously. There is a separate window for each open document. This allows working simultaneously with several drawings or 3D models, switching from one document window to another as required.
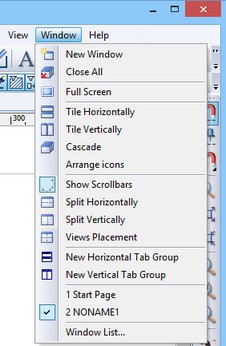
The commands designed for working with document windows are grouped in the submenu “Window” found in the textual menu.
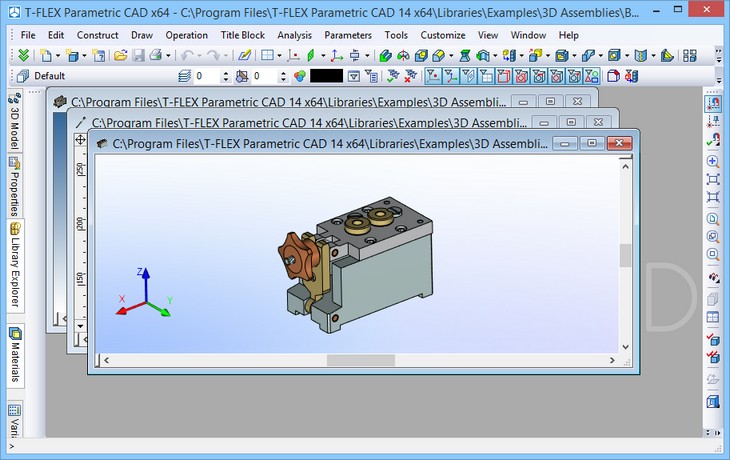
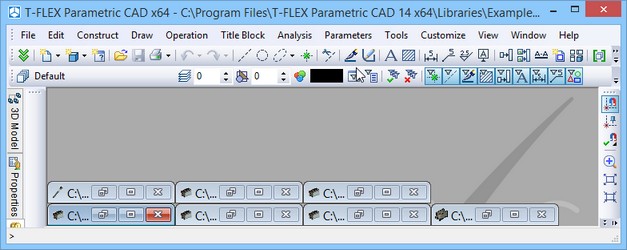
Document tabs
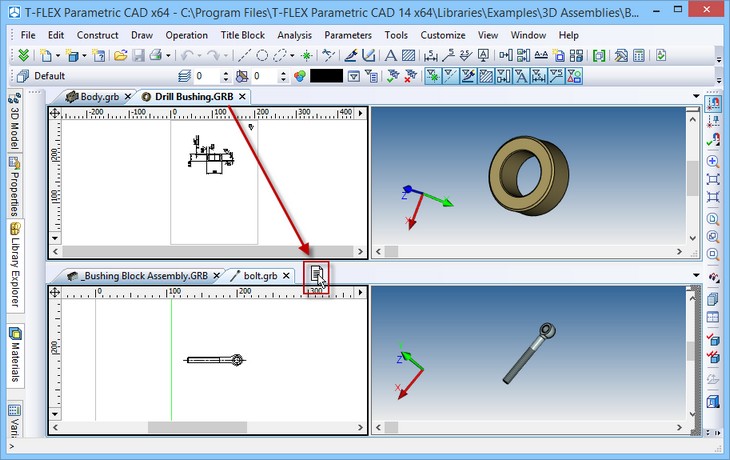
For controlling windows the document tabs can be used. Visibility of the tabs is controlled by the flag Customize > Tool Windows > Document Tabs. By using these tabs it is possible to switch from one open document window of the T-FLEX CAD into another – for this purpose it is sufficient to point the cursor at the desired tab and click ![]() . Also, with the help of tabs it is possible to change the arrangement of document windows. To do that, the cursor of the mouse should point at the tab of the document, which needs to be moved. Then
. Also, with the help of tabs it is possible to change the arrangement of document windows. To do that, the cursor of the mouse should point at the tab of the document, which needs to be moved. Then ![]() should be clicked, and without releasing the pressed mouse, the tab of the document should be moved to the required location in the row of tabs.
should be clicked, and without releasing the pressed mouse, the tab of the document should be moved to the required location in the row of tabs.
With tabs, you can also close the document window. On the right side of each tab there is button ![]() . Clicking this button will close the current window. Moreover, you can close tab by clicking mouse wheel on it.
. Clicking this button will close the current window. Moreover, you can close tab by clicking mouse wheel on it.
By default the document tabs (if they are visible in the T-FLEX CAD window) are placed above the upper border of the document window. Their location can be changed if desired. For that, it is necessary to point at the tab of any document with the cursor and with the help of ![]() call the context menu. Here you need to select the Placement item.
call the context menu. Here you need to select the Placement item.

All unsaved documents are marked with “*” symbol on their tabs.
Close document option allows to close all tabs that belong to similar document.
Close Window option allows to close current document window.
Fixed width option allows to set similar width to all opened tabs.
New main window option allows to create a new main window and copy the selected tab in it.
Move to main window option allows to move tabs between main windows.
More information about main windows can be found in “Quick start” chapter.
Windows… command opens dialog box for managing opened tabs.
More information about the Windows… command can be found in “Selection of active window” section.
Document Window View with Turned on/off Document Tabs
The view of the open documents with turned on tabs is different from that with turned off tabs.
When window tabs are on, the windows of open documents occupy the whole space of the T-FLEX CAD working window. The active window, (i.e. the window of the current document) is on the top of other documents. At the upper right corner of the active window (when the standard arrangement of the document tabs is enforced) there is a button ![]() . By pressing this button the current window will be closed.
. By pressing this button the current window will be closed.
When the tabs are turned on, it is not possible to minimize the window or change its size.
When the tabs are turned off, the windows of open documents can be in one of the three states:
1.Maximized. The window occupies the whole working area of the T-FLEX CAD, and the document title is not shown. The name of the active document appears in the title of the T-FLEX CAD window.
2.Minimized. The window represents itself a status bar with the name of the document and system buttons for controlling the window.
3.Arbitrary. The window has a smaller size than that of the working window. It has a title area, in which the name of the document is shown.
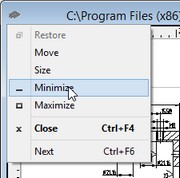
Regardless of the window size, with the tabs turned off, the document window has three buttons enabling to control its state and close the current window.
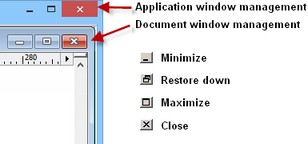
When the window is maximized, these buttons are located under the respective ones of the application window. Pay attention as to what button to use when closing a window.
An alternative way of maximizing a window is double-clicking If a window has a title bar, that is, it is not maximized, then the window management context menu can be called by pointing at the icon at the left end of the title bar and clicking The terms “collapse” and “expand” will further be used along with “minimize” and “maximize” respectively. When a window is restored down, its size can be modified. Simply move the cursor over any window edge until it changes to a double-headed arrow, and then drag the edge of the window to the desired size. |
|
Selection of active window
The active window (i.e. the window of the current document) can be selected in a number of different ways. When the document tabs are turned on, the corresponding tab should be simply pointed at with the ![]() . If the document tabs are turned off, use key combinations <Ctrl><F6> or <Ctrl><Tab> for consecutive switching from one window to another.
. If the document tabs are turned off, use key combinations <Ctrl><F6> or <Ctrl><Tab> for consecutive switching from one window to another.
Also, the list of open documents found in the textual menu “Window” can be used. The window that is currently active will be marked by tick in this list. To make another window active it is sufficient to point at it with the cursor and click ![]() .
.
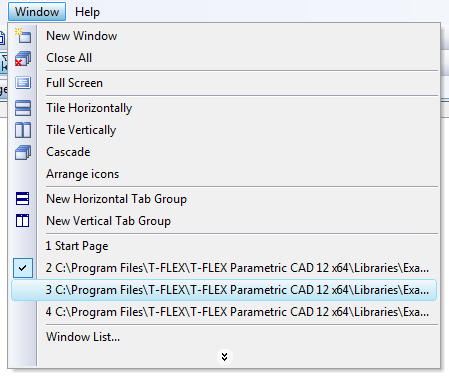
The number of windows, shown in the list, cannot exceed ten. If there are too many documents open at the moment, the command “Window|Window List…” can be used for selection of the specific window. After calling this command, the dialog box “Arrange Windows” pops up. The desired window can be chosen in this dialog box from the full list of open windows. Note that the set of available buttons in this dialog box depends on the presence of document tabs.
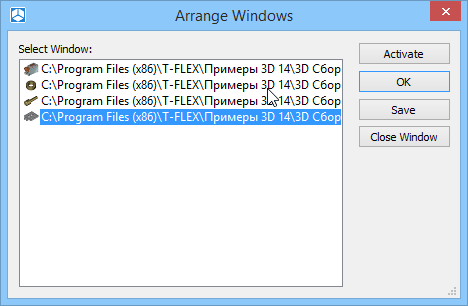
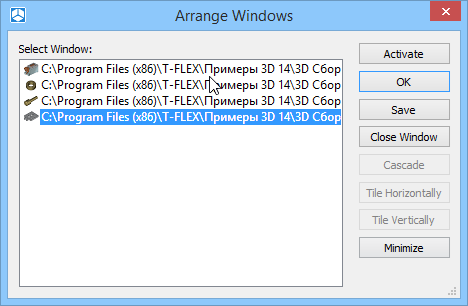
With document tabs Without document tabs
When the tabs are turned on, there is one more way for switching between the windows. In the upper right corner of the current window (with the document tabs arranged in a standard way – along the upper border of the window) there is a button ![]() . When this button is pressed, the list of all open documents pops up, in which the desired window can be selected.
. When this button is pressed, the list of all open documents pops up, in which the desired window can be selected.
Drawing window scrollbars
The system supports drawings of any format. However, the screen size is fixed. For working convenience, drawings are displayed by selected portions zoomed on screen. The scrollbars help quick navigation around the drawing page.
Calling the command "WSS: Show/Hide Window Scrollbars":
Icon |
Ribbon |
|---|---|
|
View → Window → Show Scrollbars |
Keyboard |
Textual Menu |
<WSS> |
Window > Show Scrollbars |
Hiding scrollbars increases the window working area. The function of the scrollbars is not available via keyboard input. However, there is a number of tools offering similar function, and in large variations. See, for instance, the rulers functionality described above, or the use of the mouse wheel.
Arranging document windows with turned on document tabs
When the window tabs are turned on, the document windows can be grouped into horizontal or vertical groups. Any number of document groups can be created simultaneously, however all groups must be either horizontal or vertical.
To create a new group it is sufficient to move the tab of one of the windows to the lower or upper border of the working window of the system. To move tabs, one has to point at the document tab with a cursor, click ![]() , and without releasing the mouse, move the cursor to the required place.
, and without releasing the mouse, move the cursor to the required place.
When the tab is moved to the right border of the working window, the new vertical group is created, to the lower border – the new horizontal group. When the tab is moved to the upper or right border region of the working window the command menu pops up, which duplicates commands for creating groups from the textual menu “Window”.
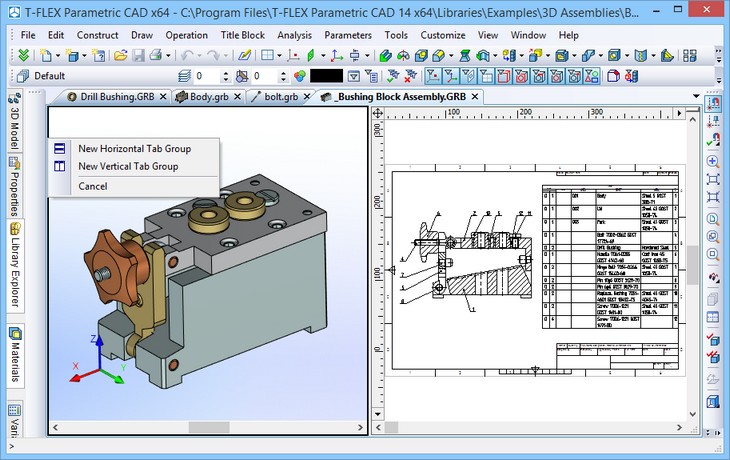
For moving windows from one group into another it is sufficient simply to place a document tab to the desired group of tabs. For removing a group it is enough to move all windows of this group into another group.
Besides the tools described above, to create or change the groups the commands of the textual menu can also be used. The commands “Window|New Horizontal Tab Group” and “Window|New Vertical Tab Group” make new horizontal/vertical group, respectively. The document window that is active at the moment of calling the command is placed into that group. The commands “Window|Move to Next Tab Group”, “Window|Move to Previous Tab Group” allow moving the window of the current document into another group.
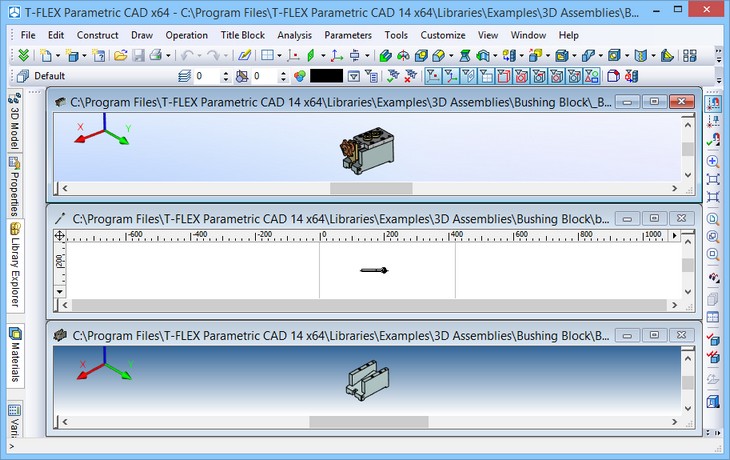
Arranging Document Windows with Turned off Tabs
If the tabs of the documents are turned off, the document windows can be expanded to the entire region of the T-FLEX CAD working window, can be diminished to the arbitrary size, can be minimized.
The document windows in this mode can be arranged in any of the traditional ways:
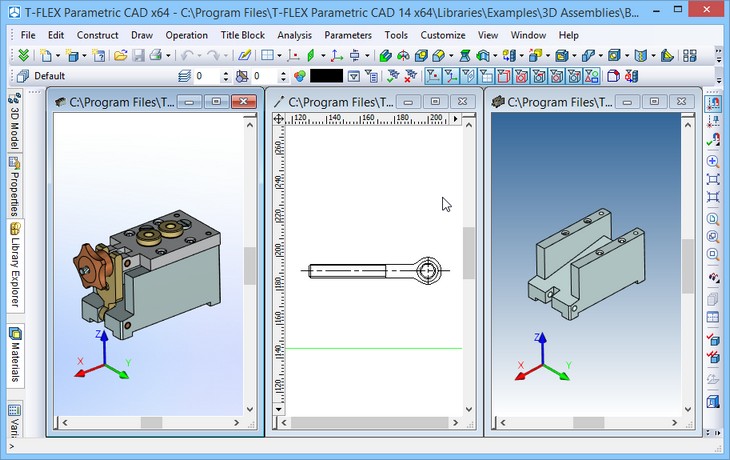
1. Tile Horizontally. Do this by the command “WHT: Tile Windows Horizontally”. Call the command using:
Icon |
Ribbon |
|---|---|
|
View → Window → Tile Horizontaly |
Keyboard |
Textual Menu |
<WHT> |
Window > Tile Horizontally |
2. Tile Vertically. Do this by the command “WVT: Tile Windows Vertically”:
Icon |
Ribbon |
|---|---|
|
View → Window → Tile Vertically |
Keyboard |
Textual Menu |
<WVT> |
Window > Tile Vertically |
3. Cascade. Do this by the command “WCA: Cascade Windows”. Call the command using:
Icon |
Ribbon |
|---|---|
|
View → Window → Cascade |
Keyboard |
Textual Menu |
<WCA> |
Window > Cascade |
The commands “WHT: Tile Horizontally”, “WVT: Tile Vertically”, “WCA: Cascade” are also available when the tabs of the documents are turned on. Using these commands in this case entails a forced transition into the mode of the turned off tabs.
When the windows of all documents are minimized, they can be placed along the lower border of the working zone with the help of the command “Window >Arrange icons”:
Additional window of document
T-FLEX CAD enables to create additional windows for already closed documents. The name of document and the serial number of the given window appear in the title bar of such windows, for example: “3D Drawing 3:1”.
All operations with the drawing/model, performed in one window of the given document, will be transferred to other windows, opened for the document. For example, if an element for editing has been selected in one window of any document, the same element will be selected in another window. Additional windows can be conveniently used when the drawing contains small elements, separated from each other at significant distances, but upon constructing a drawing both types of elements are used simultaneously. It is possible to adjust the first window with the required magnification to the first group of elements, the second – to another group. And upon creating new elements it is possible to make a simple transition from one window to another and select necessary elements.
To achieve the same purpose, splitting the document window into several panes can be applied. When this is done, inside the same document window two or four 2D or 3D windows are created, in which the drawing or 3D model of the given document will be displayed. It will be described below how to use this option.
A new window can be opened with the command "WO: Open New Window". Call the command using:
Icon |
Ribbon |
|---|---|
|
View → Window → New Window |
Keyboard |
Textual Menu |
<WO> |
Window > New Window |
After calling this command:
●If option “Set as default” is active, it automatically creates windows with preset parameters without appearance of the dialog box.
●If option “Set as default” is inactive, it works the same way as command “Views Placement”.
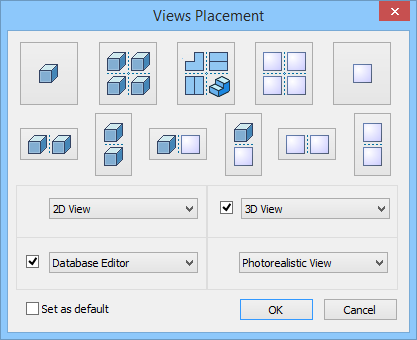
“Views Placement”:
Icon |
Ribbon |
|---|---|
|
View → Window → Views Placement |
Keyboard |
Textual Menu |
<WSV> |
Window > Views Placement |
You can choose the arrangement of 2D and 3D views from the dialog box «Views Placement» with the help of corresponding buttons or by selection from four different types of view using pull-down lists.

Splitting drawing window
An active window can be split horizontally into two views by calling the command "WSH: Split Window Horizontally":
Icon |
Ribbon |
|---|---|
|
View → Window → Split Horizontally |
Keyboard |
Textual Menu |
<WSH> |
Window > Split Horizontally |
To remove the horizontal split, toggle the icon off.
To split the current window vertically into two views, call the command "WSR: Split Window Vertically":
Icon |
Ribbon |
|---|---|
|
View → Window → Split Vertically |
Keyboard |
Textual Menu |
<WSR> |
Window > Split Vertically |
To remove the vertical split, toggle the icon off.
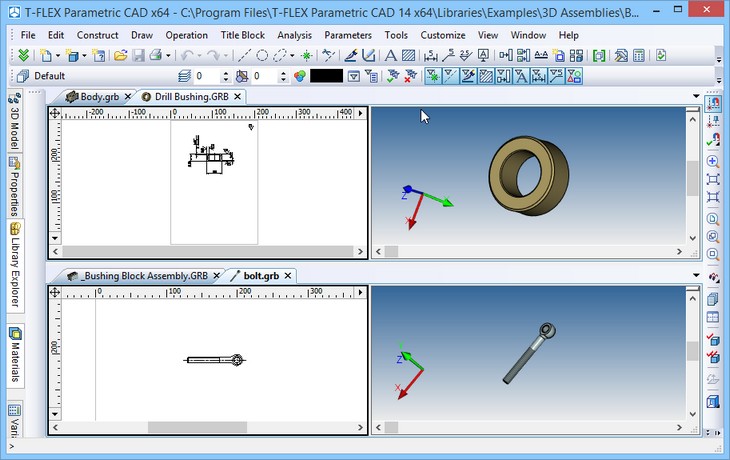
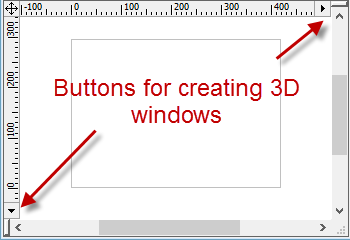
Consequent calling the two commands splits the active window into four panes. When using the 3D version of the system, each call to any of the two splitting commands brings up a dialog box on screen for specifying the type of the drawing window to be created. To split a window into two panes, one can also use the split boxes on the scrollbars. The split box at the left of the horizontal scrollbar divides the window into two panes horizontally.
To split, move the cursor to the bottom-left corner of the drawing window of the T-FLEX application. Point the cursor at the box indicated by an arrow on the diagram below. As the cursor changes to "adjust split" arrows, press and hold ![]() and drag rightwards to the desired location of the split. Then release the mouse button, and in the coming up dialog box select the new window type: "2D Window" or "3D Window" and press the [OK] button. The new window will be created on the right-hand side.
and drag rightwards to the desired location of the split. Then release the mouse button, and in the coming up dialog box select the new window type: "2D Window" or "3D Window" and press the [OK] button. The new window will be created on the right-hand side.
Once the window is divided into two panes horizontally, the split box disappears. The size of the panes can be controlled using the vertical split bar. Place the cursor over the split bar. As it changes to "adjust split" arrows, press and hold ![]() , and drag to the desired location of the split. To close a pane, drag the cursor beyond the respective border of the drawing window.
, and drag to the desired location of the split. To close a pane, drag the cursor beyond the respective border of the drawing window.
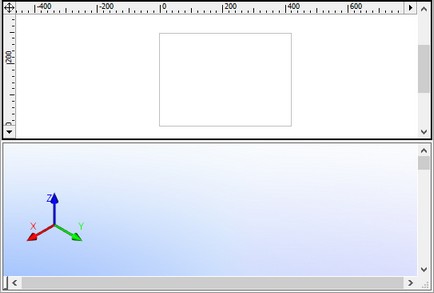
A window can be divided vertically into two panes in the same way. 2D windows have additional buttons for dividing a window into two or closing one of the two windows. These buttons are located on the rulers, one on the horizontal ruler at its right end, the other on the vertical one at the bottom. The button on the horizontal ruler works as follows. If there is currently a single window, then pressing the button splits the window vertically into two equal panes. The user is not prompted for the window type, instead, a 3D window pane is created on the right-hand side.
If the window is split horizontally into two panes, then two more 3D window panes will be instantly created by pressing the button. If the window is already split vertically into two panes, pressing the button closes the second window. If the window is split both vertically and horizontally into four panes, pressing the button will close the right pair of the panes at once. The button on the vertical ruler works accordingly. Such buttons exist in 2D windows only.
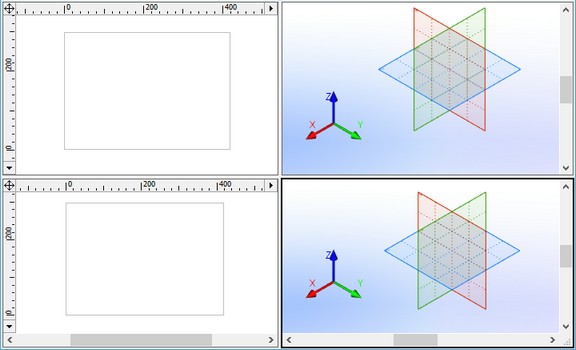
If a window is split into panes, for example vertically, then the vertical ruler is used for both parts. Actions performed with this ruler are reflected in the pane which is currently active. In the case of vertical division each pane has its own horizontal ruler. If the window is split horizontally, then two vertical and one common horizontal rulers are used. If the window is split into four panes, then four rulers work, their actions are reflected in the pane which is currently active.
To make a certain window pane active point at it with a cursor.
To get rid of window splitting it is enough to reduce the size of one of the panes up to zero. By reducing the size in this way the pane will be removed.
Splitting of the document window can be retained for further sessions with the document. To do so, enable the "Fixed set of windows" flag in the dialog box of “ST: Set Document Parameters” (the 3D tab) and save the document. When you reopen the document, the window will be divided as it was at the time you saved the document after setting the above parameter. You will not be able to change the document splitting by changing windows size to zero (moving the window's separator), or by adding a new split bar.
You can split the current 3D window, using special buttons in the left bottom corner.
Closing document window
To close the window of a document the button ![]() in the right upper corner of the window is used (with standard arrangement of document tabs). Upon pressing this button the current window will be closed. If for the given document several windows were open, then the rest of the windows remain open.
in the right upper corner of the window is used (with standard arrangement of document tabs). Upon pressing this button the current window will be closed. If for the given document several windows were open, then the rest of the windows remain open.
To close all windows of the current document at once the command “FCL: Close Model” can be used:
Icon |
Ribbon |
|---|---|
|
File → Close |
Keyboard |
Textual Menu |
<FCL> |
File > Close |
To close all windows of all open documents the command “WCS: Close all Windows” can be used:
Icon |
Ribbon |
|---|---|
|
View → Window → Close All |
Keyboard |
Textual Menu |
<WCS> |
Window > Close All |
After calling these commands the windows in which the drawings were not modified will be automatically closed. System will offer you to save changes for unsaved modified documents before their closing.
Flagged commands
In the textual menu, the icons on the left of command names indicate the command on/off status. Thus, for instance, the following diagram represents a situation when the active window is split vertically, its scrollbars being hidden.

Managing Multi-Page Documents
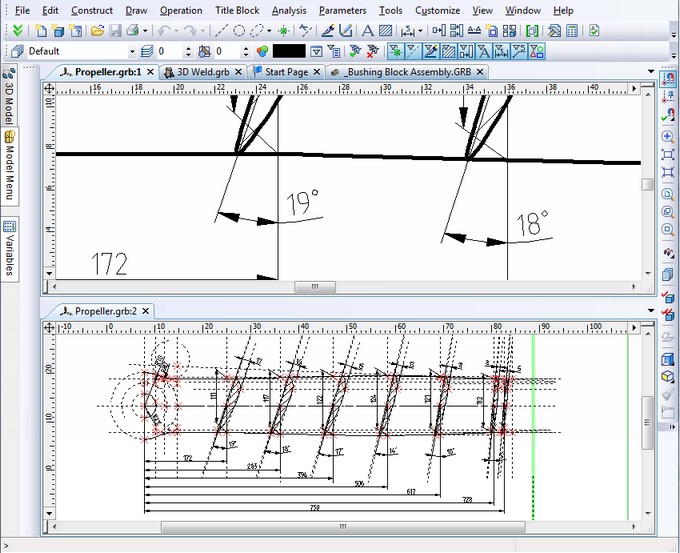
A T-FLEX CAD document may contain multiple 2D pages. The 2D window may be displaying all or only selected document pages, depending on the drawing settings. When working with a multi-page document, the user can manage the visibility of pages by removing from display those not being currently worked on.
If a T-FLEX CAD document contains several pages, then the tabs with the names of the visible pages may be shown in the lower part of the drawing’s window (with the default settings; the arrangement of the page tabs can be modified). One can switch from page to page using those tabs, by clicking them with ![]() , or by using the keys <Page Up>, <Page Down>. The tabs can be hidden/shown using the command “Customize|Tool Windows|Page tabs”.
, or by using the keys <Page Up>, <Page Down>. The tabs can be hidden/shown using the command “Customize|Tool Windows|Page tabs”.
See details on working with multi-page documents in the chapter “Pages”.
Information window
Keyboard |
Textual Menu |
|---|---|
<Alt><F1> |
Help > Information |
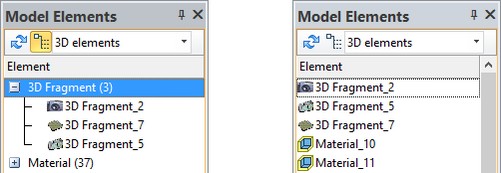
Calling this command brings up a dialog box that provides access to all current document elements for editing and information querying. Unlike the "3D Model" window, this dialog box displays all 2D and 3D elements.

The current document elements are displayed in a large pane on the left-hand side. The hierarchic structure is represented by the tree, with the base elements of the drawing or the model at the root. (The base elements are those created in absolute coordinates and not referencing any parents.) To select an element, click it with ![]() . The selected element will be highlighted on the drawing or in the 3D window.
. The selected element will be highlighted on the drawing or in the 3D window.
The following buttons become accessible for selected elements:
[Parents] reformats the model tree, leaving only the selected element and those elements referenced by this one.
[Children] reformats the model tree, leaving only the selected element and the elements that reference this one.
[Delete] closes the dialog box and calls the deletion command on the selected element.
[Edit] closes the dialog box and calls the editing command on the selected element.
[Show] closes the dialog box and zooms the active drawing (model) window on the selected element.
[Select] closes the dialog box, leaving the element selected for further manipulations.
[Measure…] calls the "Measure Element" dialog box for reading geometrical data of the selected element. The Model Tree dialog stays on screen for further actions.
[Properties…] calls the parameters dialog of the selected element. The Model Tree dialog stays on screen for further actions.
[Close] closes this dialog box.
[<<] [>>] hides/shows the following additional panes in the "Information" dialog box:
Information. This pane displays brief information about the selected element.
Attributes. This pane displays information about the attributes of the selected element.