Overflow Processing of Edge Blend |
  
|
In real situations, an overflow may quite often occur between the rounding surface and some elements of the solid geometry that are not the adjacent faces of the rounded edge. In such cases, the system may use special options for processing such overflows. These options are controlled in the Overflow Processing tab in the Parameters window.

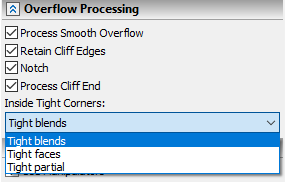
This tab contains overflow processing options checkboxes and Inside Tight Corners processing drop-down
All checkboxes are enabled by default. In this case the system tries to apply all possible options in the order of their interface layout. So Process Smooth Overflow goes first, then Retain Cliff Edges along with its Process Cliff End sub-option, and finally Notch.
You can disable or enable necessary options by using checkboxes.
In case where all checkboxes are disabled an blend surfaces overflow other edges or faces, blend operation could not be created.
This option is applicable when blend surface overflows an existing rounding of the processed body. Blend surface is deformed in the transition zone in order to provide tangency to the rounding surface.
In following examples it is necessary to enable either Process Smooth Overflow |
||
|
|
|
|
|
|
Blended edges are highlighted in green
|
Process Smooth Overflow is applied independently of other checkboxes' conditions |
Retain Cliff Edges is applied |
Process Smooth Overflow option is applicable both to Roundings and Chamfers.
In following examples it is necessary to enable Process Smooth Overflow. |
|
|
|
|
|
Blended edges are highlighted in green |
Chamfer result |
Retains a sharp edge when the rounding surface "creeps" over it. Blend surface is formed by rolling a ball which is tangent to one of the initial faces and supported by a retained edge.

In the following example it is necessary to enable Retain Cliff Edges. |
|
|
|
Blended edges are highlighted in green |
Rounding result |
In the following example it is necessary to enable Retain Cliff Edges. Process Smooth Overflow option is applicable but non-mandatory. Other overflow processing options are not applicable in this case. |
||
|
|
|
Blended edge is highlighted in green |
Process Smooth Overflow Retain Cliff Edges is enabled |
Both Process Smooth Overflow and Retain Cliff Edges |
Retain Cliff Edges option is not applicable to chamfers.
Upon enabling Retain Cliff Edges option you can additionally enable/disable Process Cliff End sub-option, which processes the case, where only ending part of blend surface overflows a sharp edge.
|
|
|
Blended edge is highlighted in green. None of the Overflow Processing options are mandatory in this case |
Process Cliff End is disabled |
Process Cliff End is enabled |
Process Cliff End sub-option is not applicable to chamfers
Rounding is constructed in such a way that the element affected by the overflow is ignored. The rounding surface is not deformed in this case, and the surfaces of the notched element are trimmed or extended to the rounding.
In following examples it is necessary to enable either Notch or Retain Cliff Edges. If both options are enabled, only Retain Cliff Edges is applied. Other overflow processing options are not applicable in these cases. |
||
|
|
|
|
|
|
Blended edges are highlighted in green
|
Retain Cliff Edges is applied independently of other checkboxes' conditions |
Notch is applied only if Retain Cliff Edges is disabled |
Notch option is applicable both to Roundings and Chamfers.
In following examples it is necessary to enable Notch. Other overflow processing options are not applicable in these cases. |
|
|
|
|
|
Blended edges are highlighted in green |
Chamfer result |
In some case when Notch option is mandatory for creating a blend it might be applied automatically and independently of Overflow Processing checkboxes condition.
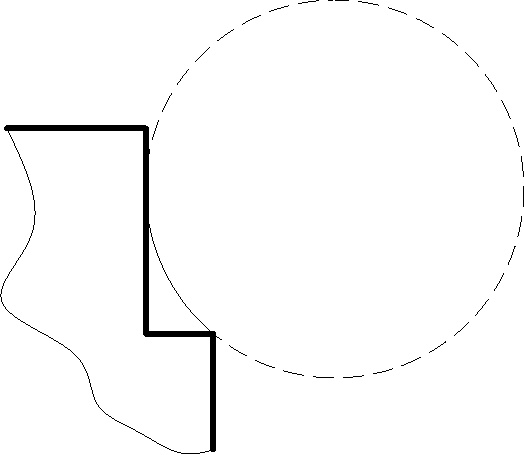
Some portions of model subjected to blending might be represented by surfaces with so small curvature radius that the blending ball of the specified radius cannot roll through while maintaining contact with sidewalls. In such a case, the system can use special processing for providing blending with the specified radius in the curved zone:
•Tight blends – in this case, the system will process curved zones using the fastest algorithm. The algorithm assumes that surfaces in these zones are created solely by blends of constant radius. If a type of an original surface is different and a blend cannot be created, an error is output.
•Tight faces – the system processes curved zones, assuming, that a zone of small curvature radius fully extends through some face of a sidewall.
•Tight partial – this is the most complex, but also versatile, algorithm. It allows processing cases, when a zone of small curvature radius covers a portion of a sidewall of a blend. In this case, a blend surface is additionally subdivided in order to provide correct processing.
Disabling unnecessary complex options allows to lower a time required for model regeneration.
Here are the examples of using different inside tight corners processing options:
|
|
Unprocessed original |
Tight blends processing |
|
|
Unprocessed original |
Tight faces processing |
|
|
Unprocessed original |
Tight partial processing |